


 1961
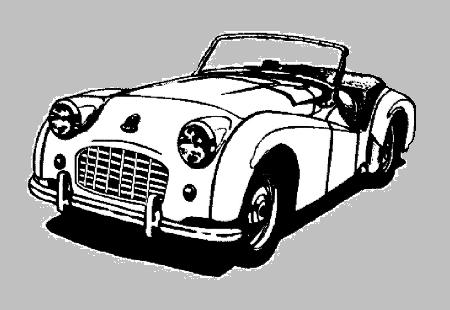
Triumph TR4 CT288L
1961
Triumph TR4 CT288L
|
Macy's Garage, Ltd. America's BEST Triumph Shop! |
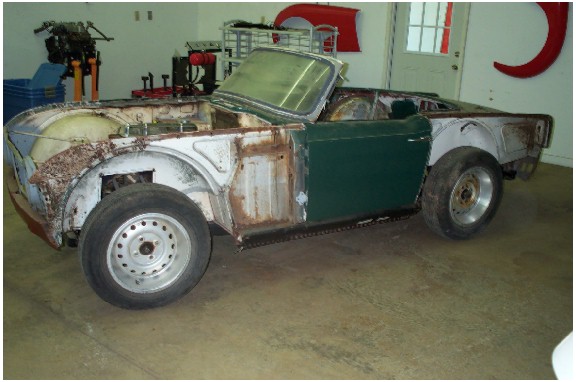
I have to admit, these early TR4's have a hold on me. I blame it on Tonda, but the truth is that we are both intrigued with the low numbered cars which have many differences from most of the TR4 production. I had been dragging my feet about restoring CT611L for quite a few years now, partially because it was going to require a new body tub to be done right, and at that point I figured that it really wouldn't be 611 anymore and probably not worth the effort. And then I was offered #288, a much more restorable car with most of the original parts intact. With Tonda already on-board, it wasn't a difficult decision to make.
|
|
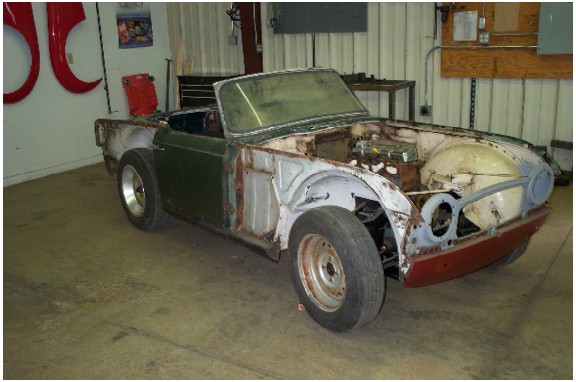
We bought this car in January of 2011, and considering the nasty weather when we brought it home, it went right into storage without taking any photos. When Tonda mentioned the great distance between home and the NC location of TRA for 2012, I knew I'd better get #288 out of storage and over to the shop, which was the first real opportunity we'd had to take any pictures. It's a complete, matching numbers car with all of the early parts remaining (plus the bonus of having #611 for a parts car). While not an LO serial number, it has had an overdrive added to the original low number gearbox, just as a Triumph dealer would have done it upon customer request when the car was new (or nearly so). |
| Overall, the car was mostly rust free. The previous
owner had installed a new front valance and outer sills, but we would
eventually grind away the MIG plug welds and reposition all of this to tweak
the alignment more to our liking. We did receive the short bubble
hood, boot lid with the early prop rod and cable strap, and a full set of
fenders with the car. We've mixed and matched all of these parts with
what was already on hand here to use the best that we had available for this
car.
You can see that this was originally a white car, and the interior was blue. It's not Tonda's favorite color combination (or mine), but being one of the few remaining early cars, I was able to convince her that it should go back to the original colors. |
 |
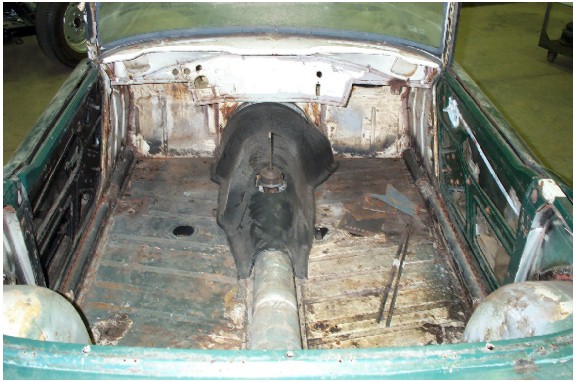 |
The floors were so-so, could have been easily patched by a home restorer on a budget, but since the replacements fit so well and we have the Auto-Twirler rotisseries to ease the process, we chose to replace both floor panels and the inner sills. Fortunately, none of the rust extended up into the toe-boards (lower firewall) or the rear seat riser panel, as we've seen so often on the TR4-6 models. |
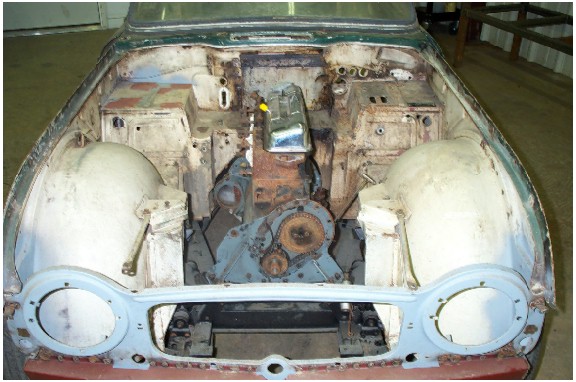
| The engine number matches the heritage certificate (CT405E),
and it was supposedly rebuilt two owners ago (about 15 years).
Naturally, I wasn't not going to trust this, so it had to come apart for one
of our 'Street Performance' rebuilds.
Once the engine was opened up, I found that the "overhaul" consisted of new rings and bearings, and not much else. The cylinder liners did not appear to have ever been out, and hiding behind them was approximately 1/2 cup of dried flaky rust particles that would have continually clogged the radiator for years to come. Little wonder that some folks believe that an electric fan is a necessity to keep these cars from overheating (not so!). |
 |
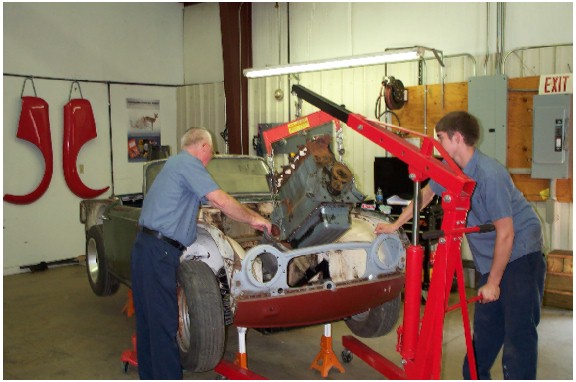 |
Austin and I pulled the engine and gearbox out as a single unit, something that is easy to do on a sidescreen car, but very difficult on the TR4-6 without a load leveling bar on the engine hoist. To clear the upper bar on the front valance, the engine must be raised and brought forward until the gearbox clears the frame, and then tilted way up so that the gearbox points down at the floor. We've repaired several TR4/6 front valances that were damaged when a previous owner (or mechanic) didn't get this right and the motor hit and bent them. The thin sheet metal valance was never designed to take this kind of abuse! |
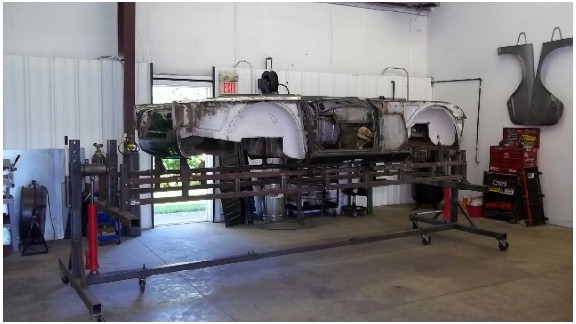
| With the engine/gearbox out, the next step was to get the body and frame separated (easy, because all of the bolts had been removed by the previous owner), and the body mounted onto the rotisserie. Normally we'll get the body tub stripped before starting any metal repair, so that we can see that what we're welding to is 100% solid and won't have to be replaced later. This tub appeared to be so good that we took a chance and decided to replace the floors first, to firm it up before the trip to Redi-Strip in Indianapolis. |
 |
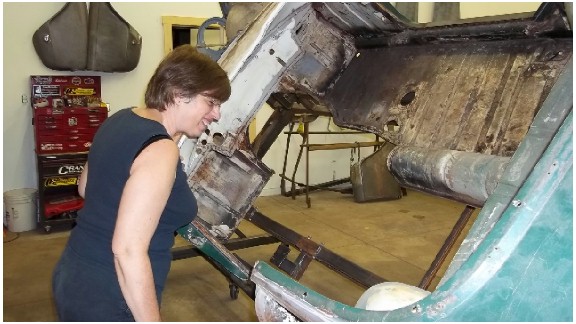 |
Tonda comes over to the shop on a regular basis to check the progress on "her" car. After we had finished surgically removing the left floor pan, Tonda stopped by to inspect the work. I can't tell if she's pleased with the work, or that we're finally making progress on her car! Probably both. UPDATE April 1, 2012: Tonda has retired from HP after 27 years, and immediately started working full-time here at Macy's Garage. Do you suppose keeping a close eye on her car was motivation for the career change? |
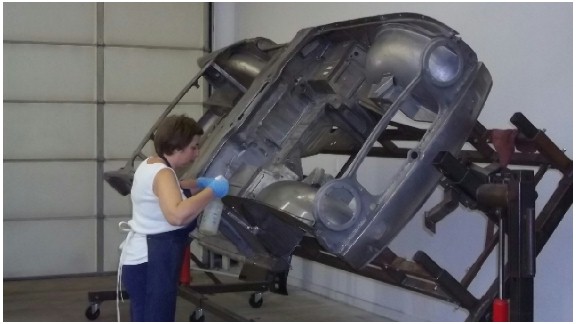
| This is our "Photo of the Week" for 11/21/2011. The floors are in, and the body is back from Redi-Strip. To help move the boys along, Tonda spent her weekend washing down the body tub with Eastwood Metal-Wash, a toothbrush, and a Scotch-Brite pad. The chemical stripping process involves immersion in 4 different tanks, two of which are to neutralize the previous chemicals, and a pressure wash treatment before we pick up the stripped pieces. To be sure that all traces of harsh chemicals (acids) are gone, we scrub everything and flood the seams with Metal-Wash, and follow this up with Ospho, a metal preservative and adhesion promoter that keeps the rust away for months, until we're ready to start the paint process. |
 |
 |
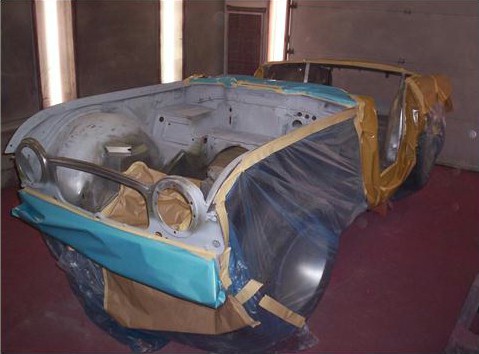
January 15, 2012: Final mock-up and all ready to go to
the paint shop! The original plan was to have this car back from paint
by now, so TRA for June is starting to look doubtful. Like the old
saying goes, a restoration costs twice as much and takes three times as long
as you think it will in the beginning! Every piece of rusty metal has been replaced with new steel in such a way that you'd have a difficult time finding them even now while the car is still in bare metal! All of the panels have been off and on multiple times by now and tweaked for perfect alignment, undoubtedly better than when it was new. Normally we would now remove the body from the frame and send it to paint on one of our spare "mule" chassis, but with this car sitting on a modified TR3 chassis (using extensions for the outrigger body mounts), we felt it would be best to perform the final body work while bolted to the original frame, and remove it later to paint and restore the chassis. It has to come off anyway to paint the bottom side after everything on the top has been primed and blocked, so we're not really making any more work by doing it this way. |
|
February 25, 2011: In the paint booth, all taped up to spray the engine bay, interior, and trunk. Paint happens quickly when you reach this stage! |
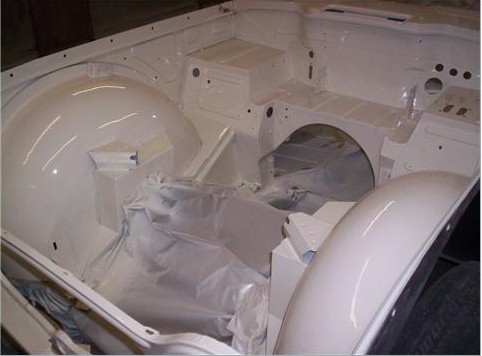
And here's what fresh Spa White looks like! All of this white will now be taped up and the exterior parts of the body tub will receive more of the same. |
| September 24, 2012: The paint work was completed in
early March, and we knew that there was no chance of completing the car to
the standard we want before TRA in June. At the same time we started
feeling squeezed for space at the shop, so CT288L was moved out of the shop
and back to our home garage until the space issue at the shop was resolved.
You guessed correctly, the car sat neglected at home for the whole summer! Tonda and I did manage to disassemble the chassis and have the frame blasted and painted, and as soon as I can get the chassis back together we'll bring everything back over to the shop for completion. The engine, gearbox, and overdrive have all been rebuilt, leaving the rear differential as the last piece of the powertrain that needs attention. |
 |
|
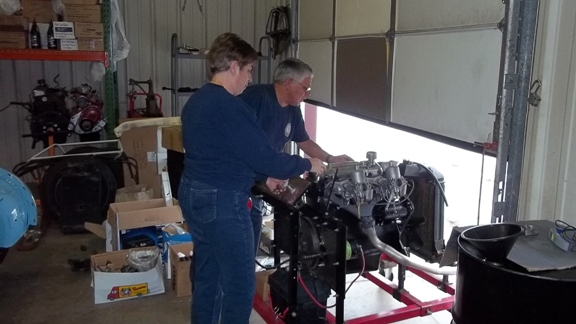
February 17, 2014: Tonda and Dave start her freshly rebuilt engine for the first time. |
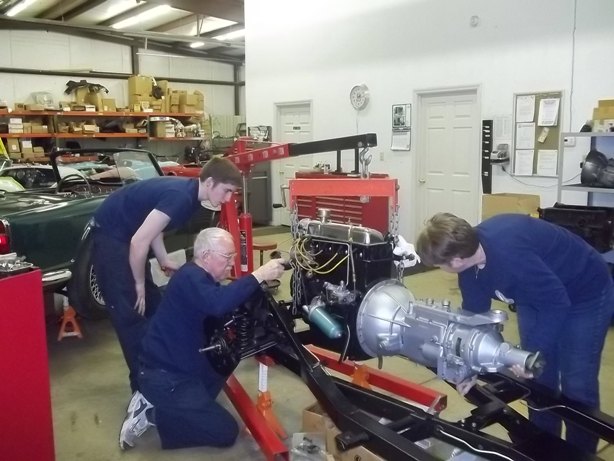
February 18, 2014: Tonda installs her engine, gearbox, and overdrive into the chassis with a little help from Mark and Austin. Note the brake & fuel lines have already been installed. |
|
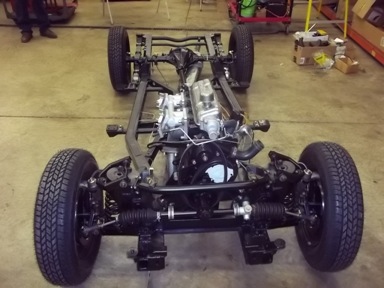
September 18, 2014: Completed chassis right down to the exhaust is ready for the body. |
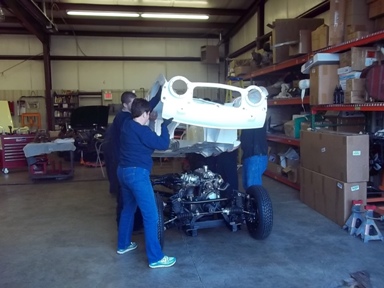
September 18, 2014: Tonda and the guys mate the painted body tub to the completed chassis for the final time. |
|
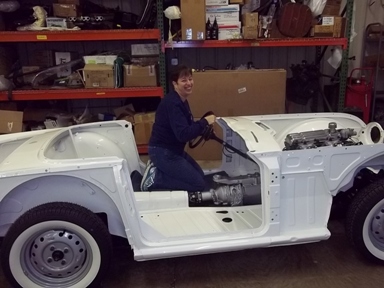
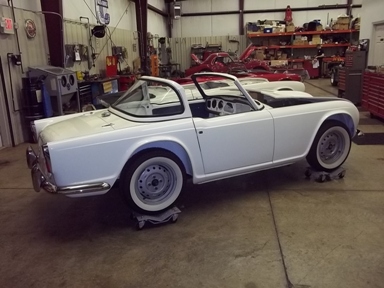
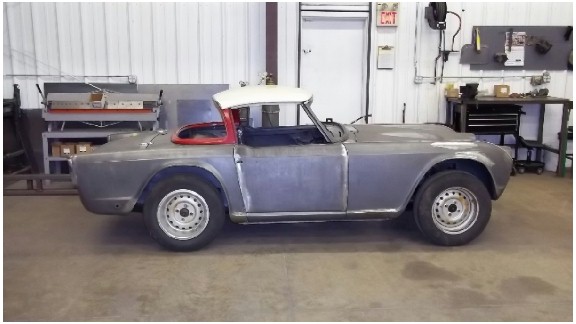
September 18, 2014: Do you think Tonda is anxious to drive her TR4? Unfortunately, the effort to build a nearly perfect car takes a very long time, especially when customer cars have the highest priority in our workshop. Yes, the wide whites are correct for the 1961 production TR4's. |
December 2, 2015: It's coming together slowly, as we sweat the details so that every nut, bolt, and washer are absolutely perfect. We have never been happy with the rear window seals for the Surrey tops, so we are working with Steele Rubber Co. to develop seals that will actually work. So far, we've made two trips to North Carolina and paid for some very expensive tooling. Watch for these new seals to be available here in early 2016. |