


 Master Cylinder Push Rod Repair
|
Macy's Garage, Ltd. America's BEST Triumph Shop! |
Repair of worn holes on Lockheed style Master Cylinder Push Rods
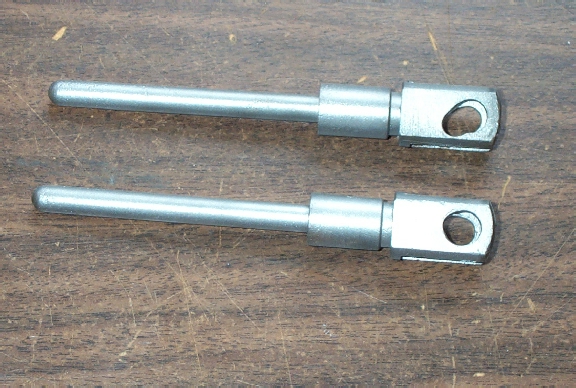 I recently had an early TR3 with the TR2 style Lockheed brakes in the shop, and I found that the brake and clutch master cylinder push rods were extremely worn (Photo #1). These parts are not available from any of the usual sources, so I had to repair them in-house. The clutch push rod gets more use, and will be worn more than the brake push rod. If yours aren't worn too badly, you can install the better of the two on the clutch side and get a several more years of use before you need to repair as shown here. |
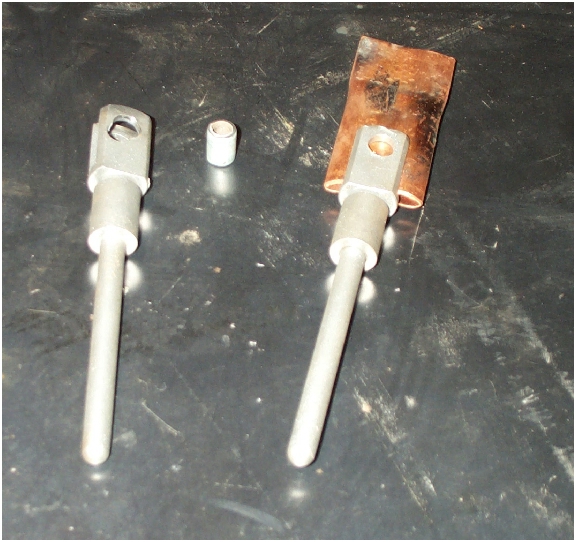 I’ll
demonstrate 2 different methods to repair the worn holes, although both will
require welding. For the pushrod on the left in Photo #2, I cut a small
piece of 3/8” steel brake line that had the correct inside diameter (5/16”)
for the clevis pin that attaches the push rod to the pedal. The holes in
the push rod on the right will be completely welded closed, and a piece of
copper pipe was crushed in a vise until it would slip in between the push
rod forks. The MIG welder I use will not stick to the copper, and this
method will leave a nice flat surface on the inside when the holes are
welded closed. I’ll
demonstrate 2 different methods to repair the worn holes, although both will
require welding. For the pushrod on the left in Photo #2, I cut a small
piece of 3/8” steel brake line that had the correct inside diameter (5/16”)
for the clevis pin that attaches the push rod to the pedal. The holes in
the push rod on the right will be completely welded closed, and a piece of
copper pipe was crushed in a vise until it would slip in between the push
rod forks. The MIG welder I use will not stick to the copper, and this
method will leave a nice flat surface on the inside when the holes are
welded closed. |
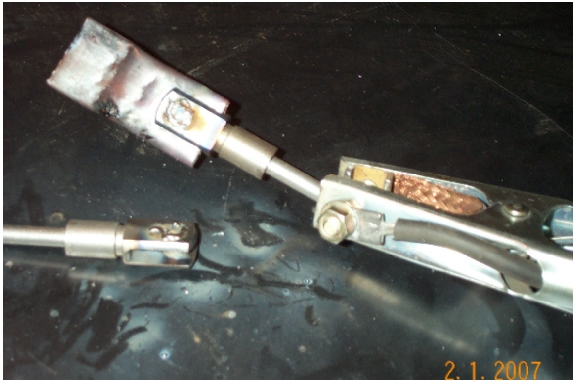 Photo #3 shows the two push rods after the steel sleeve has been welded into the first one, and the holes have been completely filled on the second. |
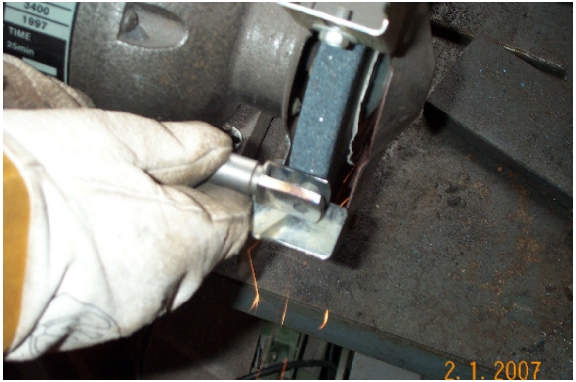 Photo #4 shows using a bench grinder to clean up the welds on the outside of both push rods. Once most of the weld is smooth, finish up with a hand file to remove the rough grinder marks. |
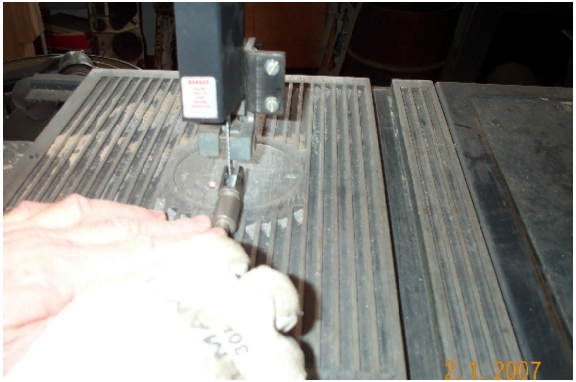 To be able to slip the pedal into position, the steel tube must be cut from between the two forks of the first push rod. In Photo #5 you can see that I’m cutting this out with a band saw, but you could also hold the push rod in a vise and cut the tubing with a hacksaw, leaving 2 thin steel sleeves in the worn pushrod holes. |
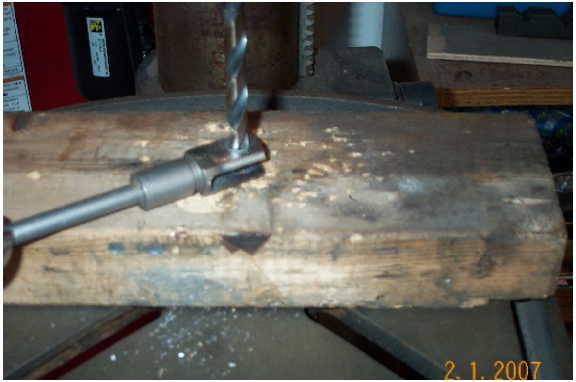 Now we’re ready to drill the new holes for the clevis pins. For the push rod that was completely welded shut, I drilled the new holes in three steps, starting with 1/8”, and working my way up to the required 5/16” I.D. The holes in the tube sleeves of the other push rod were also cleaned up with the 5/16” drill bit. (Photo #6) |
 Photo #7 shows the repaired master cylinder push rods back on the car, and ready for another 50 years! |
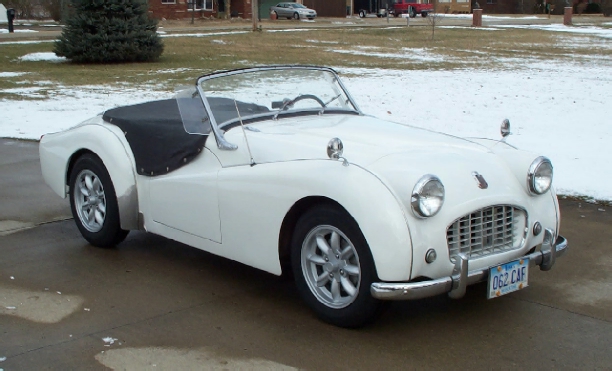
Ready for return to its owner in Iowa, after servicing at Macy's Garage. |
|