


 Wheel
Cylinder Fitting
Wheel
Cylinder Fitting
Macy's Garage, Ltd.
America's BEST Triumph Shop!
HOW TO INSTALL AND REMOVE THOSE &$#@*! WHEEL CYLINDERS!
|
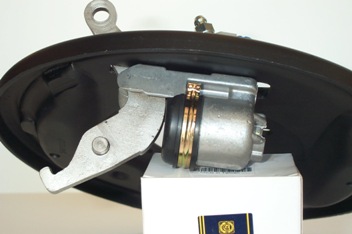
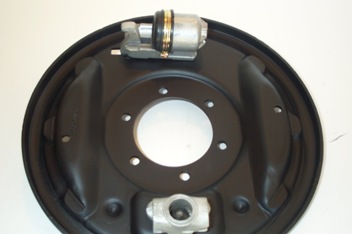
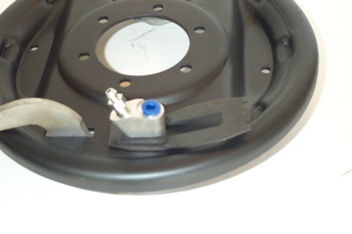
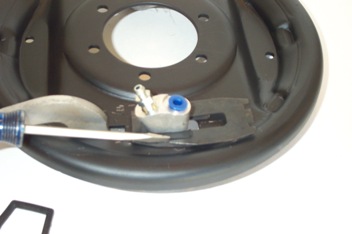
Rear wheel cylinders, Girling style Judging from all of the different ways I’ve seen this done, it’s easy to believe that this is one maintenance item which has given TR owners quite a bit of grief over the years. Replacing these buggars is difficult when they were installed correctly, and when some previous wrench handler got creative during his install, the removal can be that much more difficult. Official workshop manuals and aftermarket service publications aren’t much help outside of an occasional exploded view, but just how are you supposed to get all that stuff in there? Follow along as I show the right order to install all the bits, and then the removal should be a little easier to understand. Of course, all these photos were taken with a backing plate removed from the car, and it’ll look much different when you’re lying under the car or looking at it upside-down with your head tucked under the rear fender! |
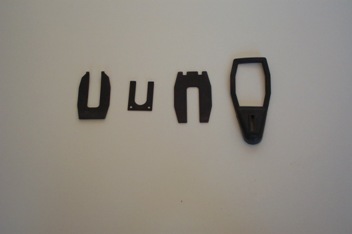
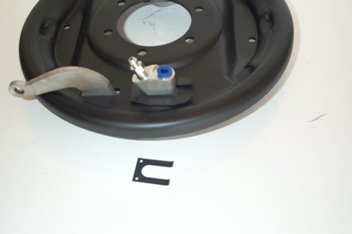
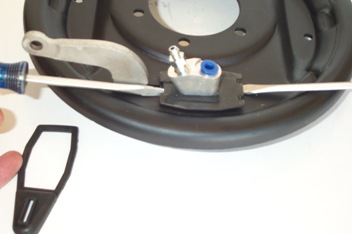
Rear wheel cylinder “fitting kits” contain everything to attach both rear wheel cylinders to the backing plates. This is 1/2 of a kit, or everything needed for one side. Parts are laid out left to right in the order of installation, and in the correct orientation to each other. The first two pieces on the left have prongs on the small ends which are shown and installed pointed “up”. |
|
This is the correct direction to install the wheel cylinder into the backing plate.
|
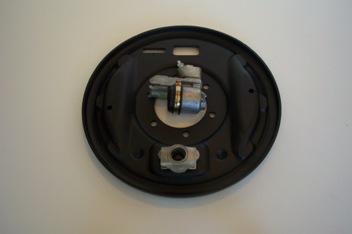
Looking at the back side of the backing plate, you can see that the wheel cylinder is in place. The first piece of the fitting kit to be installed is the spring plate. Slide this along the wheel cylinder in the direction shown, with the prongs sticking “up”. |
|
View of the spring plate in position around the wheel cylinder, prongs pointing “up” or away from the backing plate.
|
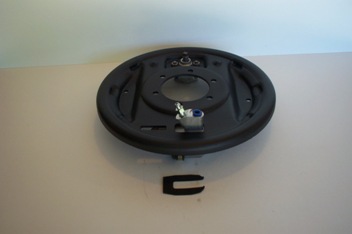
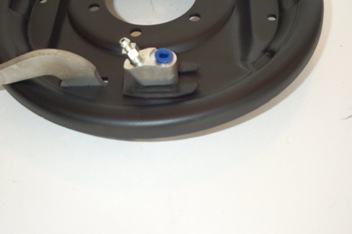
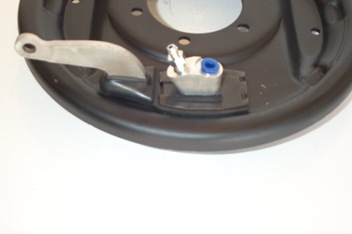
The next piece to go in will be the handbrake lever. With only the spring plate in place, you will be able to lift the wheel cylinder just enough to slip the two round pegs on the arm between the wheel cylinder and the backing plate. Try to put this in first, and you won’t be able to install the spring plate in the right direction. |
|
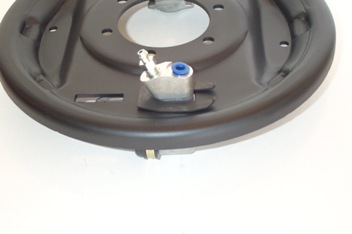
Here is the handbrake lever in its correct position. Pay attention and position it in the right direction, so you won’t have to take it all apart to turn this lever around later! (Lesson learned the hard way!)
|
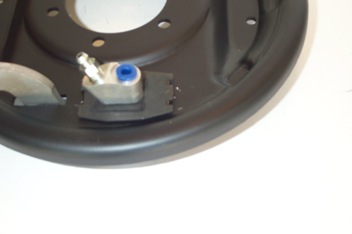
View from the rear, with the wheel cylinder through the backing plate, spring plate holding it in (loosely), and the handbrake lever installed. The little distance washer shown below is installed next in the same direction as the spring plate, prongs pointing “up” away from the backing plate. |
|
The distance washer is short enough that you’ll be able to slip it past the handbrake lever and under the shoulder on the wheel cylinder, on top of the spring plate.
|
The locking plate is next, and it installs facing the opposite direction of the previous two. It also slides in between the spring plate and the distance washer. You’ll have to drive this in with a punch or screwdriver and a hammer. Keep it pointed straight through this process by tapping one side and then the other. |
|
Once the locking plate is fully in, the prongs of the spring plate will snap up into the small notches and hold the locking plate in place. You may have to tap the spring plate back in from the other side to make this happen. And as you can see, there goes the nice paint on your backing plate! |
Your wheel cylinder is designed to slide back and forth in the backing plate a small amount, and this is the time to check this. If it won’t slide, it will all have to come back apart to find the problem. If the cylinder slides, install the rubber dust boot before you attach the hydraulic line or handbrake cable. The thin part of the boot will slip under the locking plate as shown. |
|
Removing a wheel cylinder that has been installed correctly is the reverse of installation, with one exception. You’ll have to pry the lock plate up and away from the prongs on the spring plate before you can drive the lock plate back out. This would be easy if we each had about 5 hands. Screwdrivers, putty knives, and lots of cursing will all be required. |
Once you get to this point, you’ve got it made! Now if some previous owner or mechanic put this together with his own method, all bets are off on getting it apart. And as you can see, the paint on the backing plate does take a beating during all this. Cars without these battle scars are probably “over restored”! |