


 Bodywork Basics
|
Macy's Garage, Ltd. America's BEST Triumph Shop! |
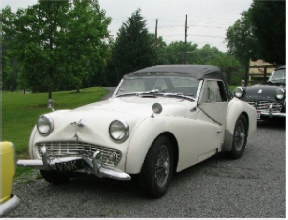 There was a
high profile accident at the 2009 Triumph Register of America National Meet, when
the TRA Newsletter Editor (driving) and Technical Advisor (innocent passenger)
slid off of a wet curve on the way to the Pig Roast and drilled a sign. No
one was injured, outside of the Editor's ego and his TR3B, and the car remained driveable
for the rest of the event.
There was a
high profile accident at the 2009 Triumph Register of America National Meet, when
the TRA Newsletter Editor (driving) and Technical Advisor (innocent passenger)
slid off of a wet curve on the way to the Pig Roast and drilled a sign. No
one was injured, outside of the Editor's ego and his TR3B, and the car remained driveable
for the rest of the event.
Now came the job of repairing the bent sheet metal. The wrecked part had been stretched quite a bit, so the decision to replace it was easy. New aprons are available, but the price tag is just shy of $3300.00, and then it's not going to fit, so there will be plenty of extra hours needed to make it work.
All of the mint condition used parts have been used up years ago, so the search began for something better than what he had. A decent appearing apron was found pretty quickly through the network of TRA members, (another reason you should belong to TRA if you own a TR2-TR4A!), and the work to make it perfect could begin.
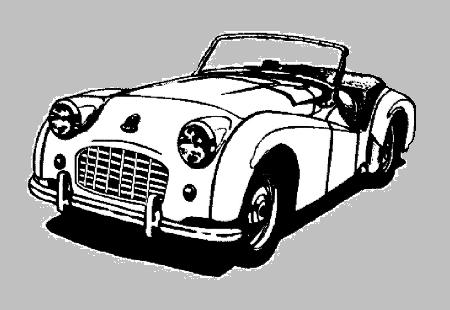
Follow along as we repair this 'typical' front apron.
|
|
|
 The
goal here is to repair this apron by a better method than was used the last
time. Filling this mess with filler is NOT the best option, as filler
shrinks over time in proportion to it's thickness. For an ideal
repair, body hammers and dollies will be used to move the metal back
into position. Don't just grab a ball-peen hammer from your tool box
and start swinging! The
goal here is to repair this apron by a better method than was used the last
time. Filling this mess with filler is NOT the best option, as filler
shrinks over time in proportion to it's thickness. For an ideal
repair, body hammers and dollies will be used to move the metal back
into position. Don't just grab a ball-peen hammer from your tool box
and start swinging!
|
|
 This
is what the right side looked like after a few hours of careful work with
the hammers and dollies. The bent metal has been carefully moved back
into shape. Note the weld seam below the bumper hole, where it has
been repaired before. The apron wasn't straight when this was welded,
so we'll have to cut it and start over in this area. This
is what the right side looked like after a few hours of careful work with
the hammers and dollies. The bent metal has been carefully moved back
into shape. Note the weld seam below the bumper hole, where it has
been repaired before. The apron wasn't straight when this was welded,
so we'll have to cut it and start over in this area. |
 The
left side also responded to the hammer & dolly work, which was applied all
along the front of the apron at the same time, back and forth across the
entire front to bring the whole lower edge forward as a unit.
Comparing to the first couple of photos, you can see the progress that's
already been made. The
left side also responded to the hammer & dolly work, which was applied all
along the front of the apron at the same time, back and forth across the
entire front to bring the whole lower edge forward as a unit.
Comparing to the first couple of photos, you can see the progress that's
already been made. |
 The
left edge was in pretty bad shape, with large chunks of the mounting flange
completely gone. This is common on these parts, and new metal was
welded in to fix the problem, paying careful attention to maintain the
proper curve to the apron edge. We also welded new HD cage nuts to
both sides. The
left edge was in pretty bad shape, with large chunks of the mounting flange
completely gone. This is common on these parts, and new metal was
welded in to fix the problem, paying careful attention to maintain the
proper curve to the apron edge. We also welded new HD cage nuts to
both sides. |
 Nice
solid mounting edge, new heavy duty cage nuts, and the correct contour to
match the fender. It doesn't get much better than this! Did I
mention that you'll need a welder, and need to be proficient at welding thin
sheet metal without warping or burning through? Nice
solid mounting edge, new heavy duty cage nuts, and the correct contour to
match the fender. It doesn't get much better than this! Did I
mention that you'll need a welder, and need to be proficient at welding thin
sheet metal without warping or burning through? |
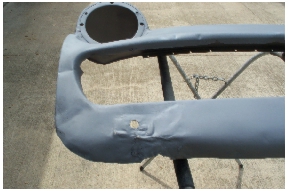
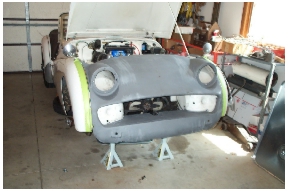 First
of many test fittings to confirm that this apron was going to fit as it
should. After all of the bodywork has been completed and the paint
applied is the wrong time to find that an adjustment is needed. The
apron is still in bare metal at this point. First
of many test fittings to confirm that this apron was going to fit as it
should. After all of the bodywork has been completed and the paint
applied is the wrong time to find that an adjustment is needed. The
apron is still in bare metal at this point. |
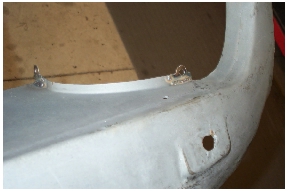 Mounting
tabs inside the grille opening had all broken or rusted off at some time in
the past, and had to be replaced with new fabricated pieces. Mounting
tabs inside the grille opening had all broken or rusted off at some time in
the past, and had to be replaced with new fabricated pieces. |
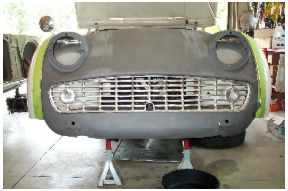 On
the second fitting, we also checked the grille opening and alignment with
the bumper braces and mounting holes. On
the second fitting, we also checked the grille opening and alignment with
the bumper braces and mounting holes. |
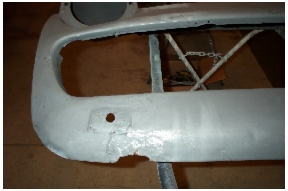
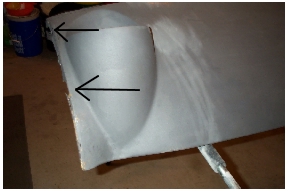
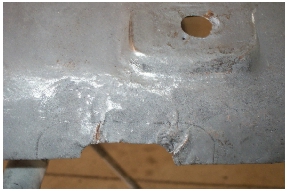 Close-up
of the left lower edge, below the bumper mount pad. I don't know why
Triumph put these oval cut-outs in here, but these have been beaten and
severely wrinkled before. This calls for a new metal replacement of
this area if it's ever going to look right again. Close-up
of the left lower edge, below the bumper mount pad. I don't know why
Triumph put these oval cut-outs in here, but these have been beaten and
severely wrinkled before. This calls for a new metal replacement of
this area if it's ever going to look right again. |
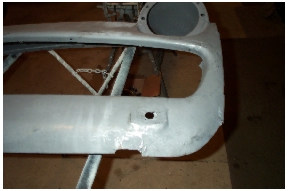
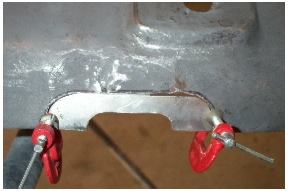 The
damaged area has been cut out, and a new metal patch has been made and
clamped in place. Time to get that welder back out! The
damaged area has been cut out, and a new metal patch has been made and
clamped in place. Time to get that welder back out! |
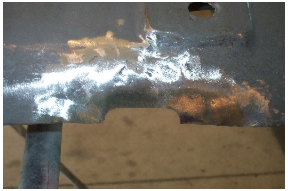 This
is the result after welding and then grinding the excess weld away.
Big improvement already, isn't it? This
is the result after welding and then grinding the excess weld away.
Big improvement already, isn't it? |
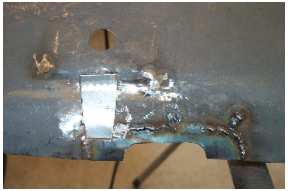 This
same area on the right side had been not only mangled, but broken and welded
before, which trapped an incorrect shape in this area. Thus, a second
patch was needed on this side to get everything back where it belonged. This
same area on the right side had been not only mangled, but broken and welded
before, which trapped an incorrect shape in this area. Thus, a second
patch was needed on this side to get everything back where it belonged. |
 Once
again, the results after welding and grinding are starting to look like they
should. Once
again, the results after welding and grinding are starting to look like they
should. |
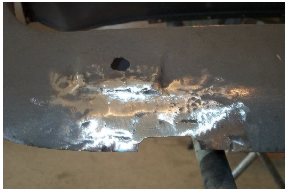
 After
sandblasting had removed all of the old paint and body filler, the true
condition of the replacement apron could be seen, and it wasn't a pretty
sight! Still better than the one which wrapped itself around the sign
post, so we'll proceed to make it perfect!
After
sandblasting had removed all of the old paint and body filler, the true
condition of the replacement apron could be seen, and it wasn't a pretty
sight! Still better than the one which wrapped itself around the sign
post, so we'll proceed to make it perfect!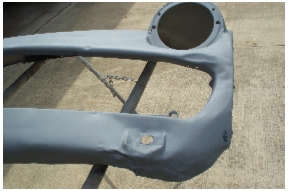 The
left side was just as bad as the right, and pretty typical for a used
Triumph front apron. Why is it that everyone always bangs up the front
end?
The
left side was just as bad as the right, and pretty typical for a used
Triumph front apron. Why is it that everyone always bangs up the front
end?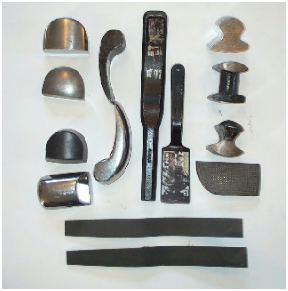 A
selection of dollies are needed to go along with the assorted body hammers
in the previous photo. Add to that some slapping files and spoons if
you really get serious about this. Starter sets are available for
around $30, but the metal is soft and will not stay smooth, transferring
rough imperfections to your work piece. Better tools will cost you $30
or more EACH.
A
selection of dollies are needed to go along with the assorted body hammers
in the previous photo. Add to that some slapping files and spoons if
you really get serious about this. Starter sets are available for
around $30, but the metal is soft and will not stay smooth, transferring
rough imperfections to your work piece. Better tools will cost you $30
or more EACH.This completes the metalworking phase of this repair, with all of the metal in very close proximity to where it is supposed to be. This apron could be completely metal finished to a flawless surface without the use of any filler, but the time needed to reach this level of metal finish would triple the hours required to get it to this point. As stated earlier, fillers shrink in proportion to their thickness, and the metal is so close now that any required filler will be no thicker than a file folder, and won't pose any long term issues. Click on the link below to see the steps needed to complete the bodywork and preparation for paint.