© 2026 - Macy’s Garage, Ltd.
Macy’s Garage

STEERING
BOX-2
TR2-3B Steering Box Rebuild - Page 2
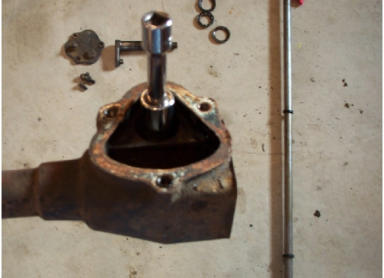
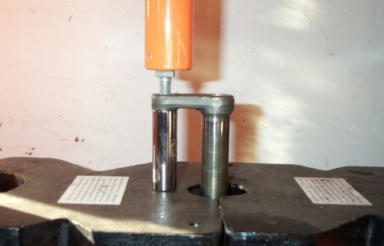
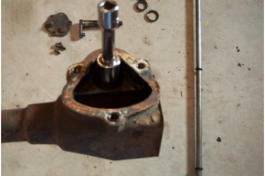
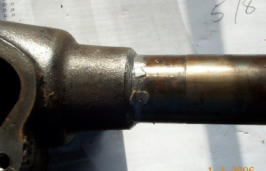
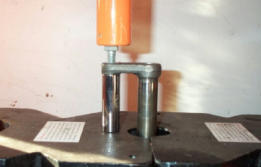
Here you can see the washer in place on top of
the bushing. Position it so that it sits perfectly on
top of the bushing, where it gives you a surface
to push against.
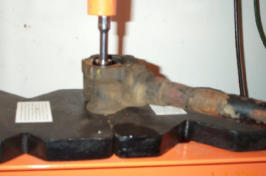
Use a socket and extension or solid bar that is
slightly less than 1” O.D. to push the washer and
bushing out through the bottom of the box. You’ll
need slow steady pressure to remove the
bushing, so don’t expect to do this with a
hammer!
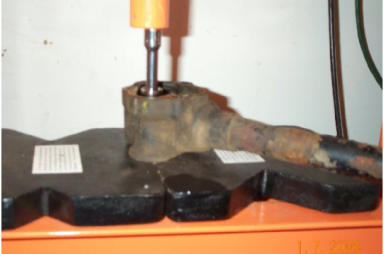
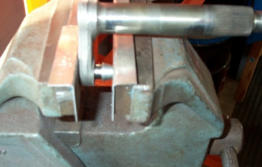
A press is almost imperative to push the bushing
out of the box. Be sure to support the box over a
hole that’s large enough for the bushing to pass
through as it exits out of the bottom of the box!
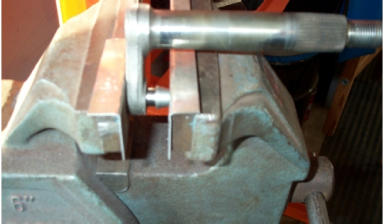
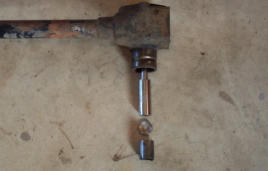
Here’s how the bushing will come out of the
bottom of the box, followed by the 1” washer and
whatever you are using to push it through.
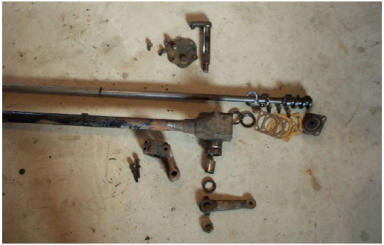
Disassembly is now complete, so it’s time to start
cleaning parts. Only after every piece is clean
should you examine them to determine what will
have to be replaced, and which pieces can be
re-used. Tiny rust pitting on bearings and
bearing surfaces may not be visible until after
every part has been cleaned and dried.
We don’t recommend having your parts cleaned
by heat or harsh and caustic chemicals. The
joint between the box and the column tube is a
sweat solder joint, and heat or harsh chemicals
will eat away the solder, allowing the tube to
come out of the box. It takes a very careful and
practiced technique to align and re-join these
parts. If your’s comes loose, you should really
consider sending it here to be repaired.
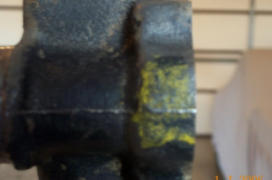
Concours restorers should take note of the
yellow paint ion the drop arm and the date code
stamped on the end plate.
More yellow paint can be found on the steering
box itself. We find traces of this on every non-
restored steering box we see (LHS cars).
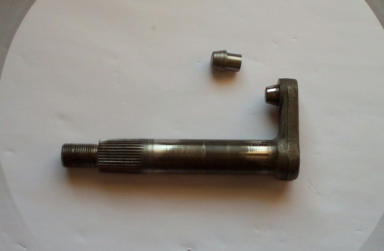
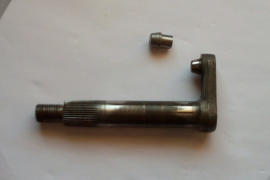
If any wear is seen on the rocker shaft peg, it
can be replaced, but inspect the rocker shaft for
twisted or gouged splines, and pits or scrapes in
the bushing and seal locations. If any are found,
you’ll need to replace the whole rocker shaft.
Old worn pegs need to be pressed out, and be
sure to support the rocker shaft when doing so.
The cast iron arm on top of the rocker shaft is
somewhat soft, and will bend out of shape long
before it snaps and breaks, causing mis-
alignment between the peg and the worm gear,
with hard steering as a result. And we all know
these cars steer hard enough with modern radial
tires!
A large vise works well to press the new peg into
place, but be sure to take your time and make
100% certain that it is aligned correctly. Back to
that soft cast iron, it is possible to push the hard
steel pegs in crooked, tearing up the hole in the
rocker shaft and destroying a good shaft that you
might have been able to re-use. Once a peg has
been pushed in crooked, the rocker shaft
becomes junk.
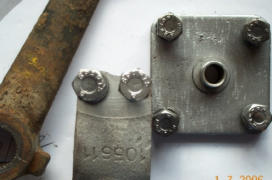
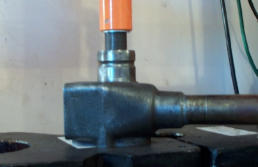
Back to the press with another 1” O.D. washer,
it’s time to press the new bushing into the box.
There is a top and bottom to these bushings,
and you can tell which is which by looking at the
large U shaped groove inside the bushing.
Install the bushing so that the top of the U will be
pointed UP when the box is in the car. Just as
when installing the peg, go slowly and make
sure the bushing is perfectly aligned with the
bore.
America’s BEST Triumph Shop


© 2026 - Macy’s Garage, Ltd.
Macy’s Garage


America’s BEST Triumph Shop

TR2/3 Steering Box
Rebuild - Page 2
Use a socket and extension or solid bar that is slightly less than 1” O.D. to push the washer and bushing out through the bottom of the box. You’ll need slow steady pressure to remove the bushing, so don’t expect to do this with a hammer! A press is almost imperitave to push the bushing out of the box. Be sure to support the box over a hole that’s large enough for the bushing to pass through as it exits out of the bottom of the box! Disassembly is now complete, so it’s time to start cleaning parts. Only after every piece is clean should you examine them to determine what will have to be replaced, and which pieces can be re- used. Tiny rust pitting on bearings and bearing surfaces may not be visible until after every part has been cleaned and dried. If any wear is seen on the rocker shaft peg, it can be replaced, but inspect the rocker shaft for twisted or gouged splines, and pits or scrapes in the bushing and seal locations. If any are found, you’ll need to replace the whole rocker shaft. Old worn pegs need to be pressed out, and be sure to support the rocker shaft when doing so. The cast iron arm on top of the rocker shaft is somewhat soft, and will bend out of shape long before it snaps and breaks, causing nis-alignment between the peg and the worm gear, with hard steering as a result. And we all know these cars steer hard enough with modern radial tires! A large vise works well to press the new peg into place, but be sure to take your time and make 100% certain that it is aligned correctly. Back to that soft cast iron, it is possible to push the hard steel pegs in crooked, tearing up the hole in the rocker shaft and destroying a good shaft that you might have been able to re-use. Once a peg has been pushed in crooked, the rocker shaft becomes junk. Back to the press with another 1” O.D. washer, it’s time to press the new bushing into the box. There is a top and bottom to these bushings, and you can tell which is which by looking at the large U shaped groove inside the bushing. Install the bushing so that the top of the U will be pointed UP when the box is in the car. Just as when installing the peg, go slowly and make sure the bushing is perfectly aligned with the bore. Continue to Stg Box Page-3